Monday 28 February 2011

BBTB2 BIRD CAGE/BIRD HOUSE CHALLENGE AND END OF MONTH BLOGHOP!


It's ages since I blogged, I've been really out of sorts for the last few weeks, but hopefully I'm on the mend now!
So, as it's Monday it's time for another challenge at BBTB2! Our very own super talented Sandi chose the cut for us this week but alas has been having problems with her computer so the wonderful Carole has taken the helm this week!
Anyway on to the challenge! The cut is either the birdcage from Straight From The Nest or the birdhouse from Stretch Your Imagination, but if you don't have these cartidges please use any that have a birdcage/birdhouse on.
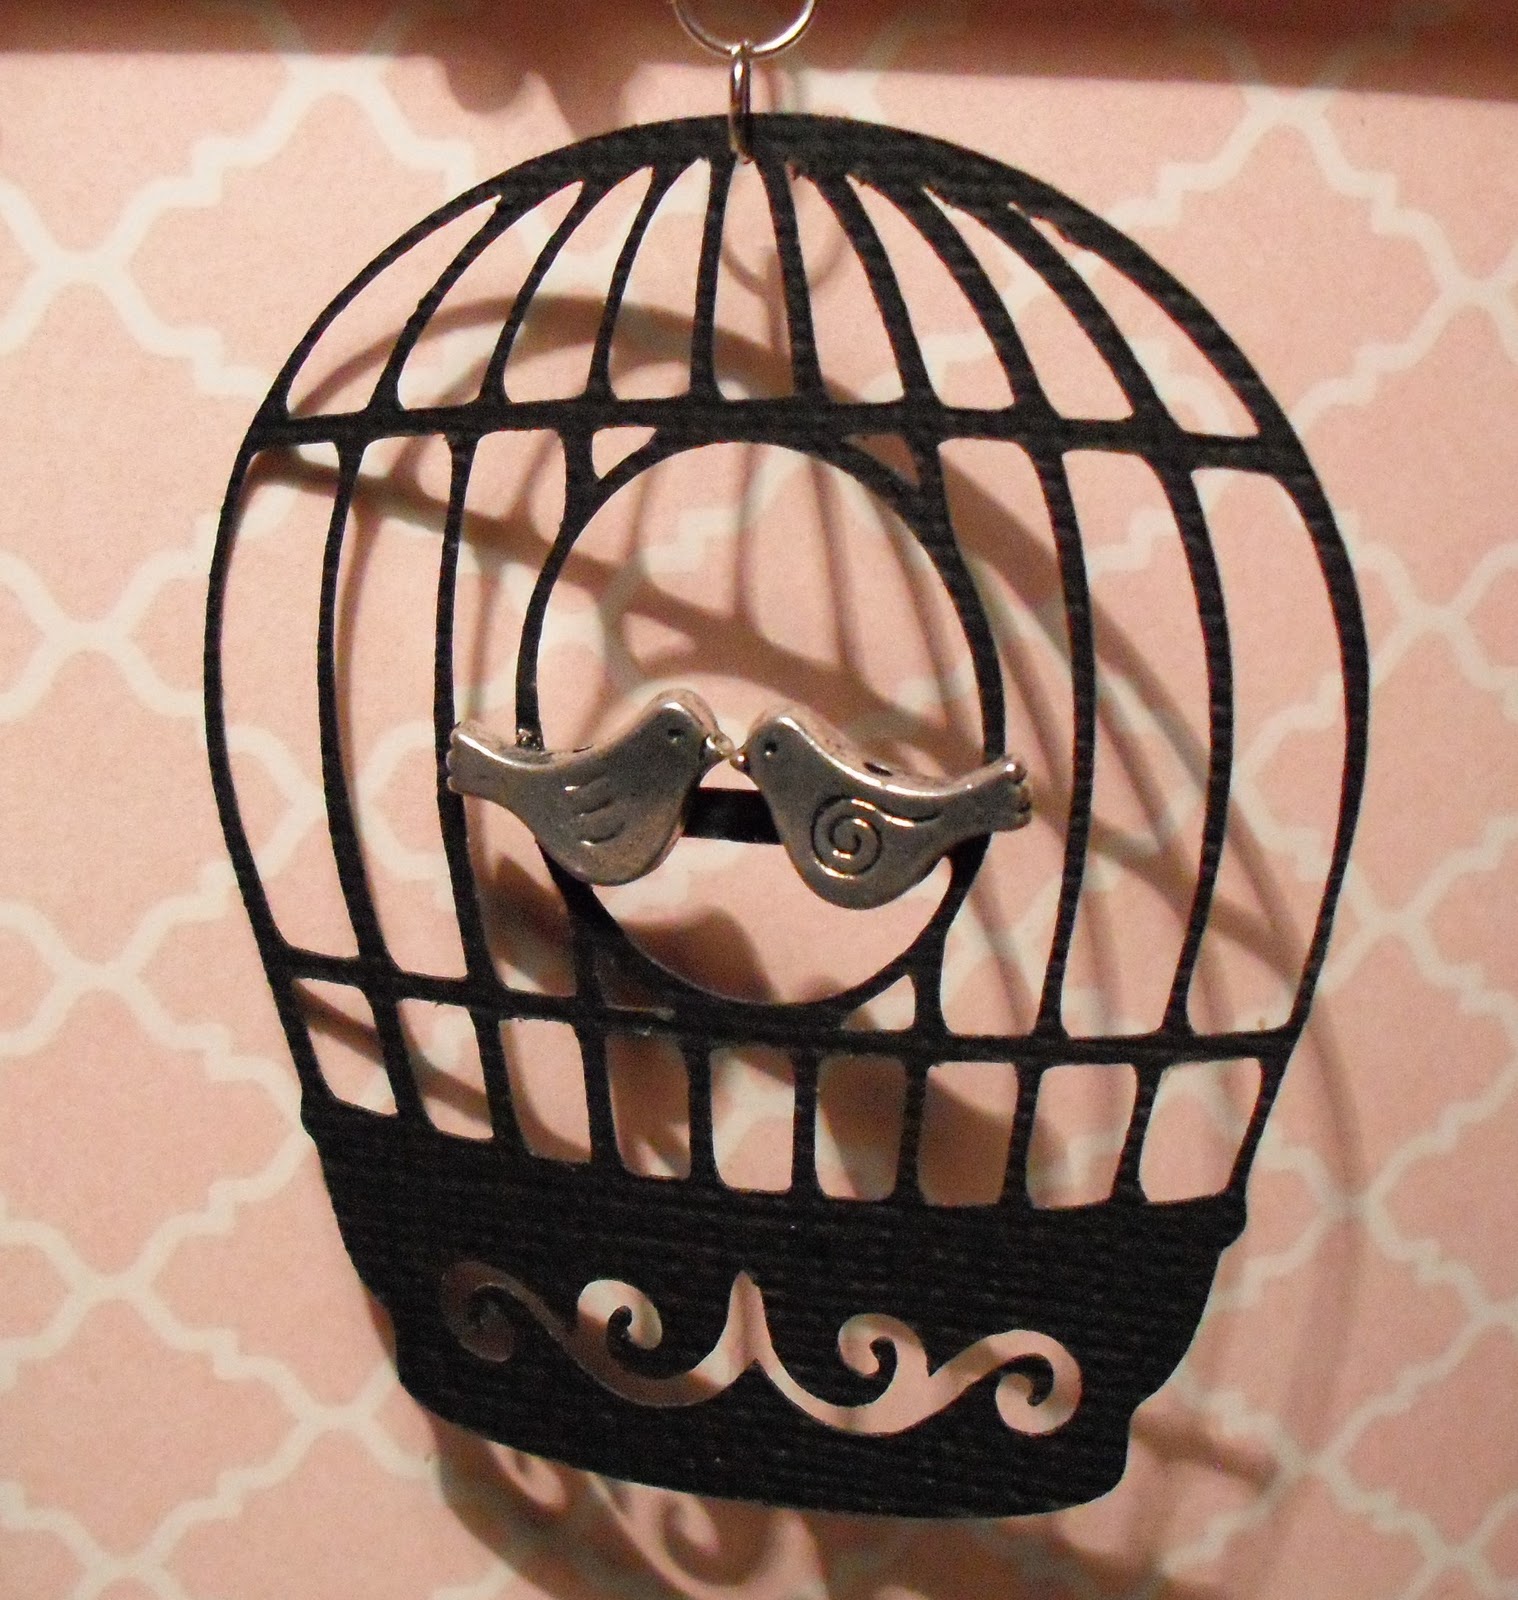
I went with the birdcage from Straight From The Nest and my card is quite simple. I cut the birdcage at 3 1/2" in black and let me tell you I am amazed at how beautifully my Cricut cut this, parts of the cage are only about 1mm wide ! I created the base card with aperture using Design Studio and Plantin School which is 5 1/2" square with a 4" square aperture. Papers used are DCWV and MME. I added 2 little metal bird beads on the perch and hung the  cage in the aperture using 3 jump rings.Then I added some roses around opposite corners. The tiny black swirls between the roses are the waste from the cage! Finally I added a rub on sentiment.
Now for the fun bit! It's end of month bloghop so  make sure you visit my DT sisters blogs and you may even win some candy on the way!
We hope you will join us at BBTB2 in our challenge this week, we love seeing your creations
Thanks so much for stopping by and have a great week!
Juliexx

Tuesday 8 February 2011

CUTTLEBUGSPOT STEP CARDS


Good afternoon
Over at the Cuttlebugspot this week we are continuing on our theme for the month of different style cards. This week Nilda asked for a step card and this is my take on it!
My step card base is a sheet of 8 1/2x11", for the base I used a turquoise glitter striped cardstock I've had in my stash forever! I used my Scorepal and scored at 1"then 2" then 4" then 6" then 8 1/2"and folded like you would a fan. This gave me my step card so now just to decorate it.I used my Cricut for the cuts and Happy and Birthday is cut from Martha Stewart Elegant Cakes at 3" shadow in black and base in pink and pale green pearlescent card. Base cuts have been embossed with Cuttlebug folder Swiss Dots.These have then been pop dotted on to the top and bottom steps of the card. The row of presents are cut from Straight from the Nest cart  and I cut 2 border cuts (one on flip) and one  single in tangerine, lilac and pink pearlescent card and the top layer in black These have been embossed using Cuttlebug A2 combo Welcome Baby ,CB folder Victoria and Sizzix folder Diamonds.There you have it a bit bold and reminds me of Liquorice Allsorts!
Make sure you visit the Cuttlebugspot as my DT sisters have created the most fantastic stepper cards this week and we'd love you to join us in this fun challenge!
Nilda isn't feeling well this week so get well soon Nilda
Thanks so much for stopping by
Juliexx

Monday 7 February 2011

BBTB2 FENCE CHALLENGE


Good afternoon from a very windy Wales! The wind has been howling here for days!
Over at BBTB2 this week the Amazingly talented Theresa aka Treefrog asked us to use the Fence/Gate from Cricut Lite Cartridge Bloom or any other cartridge  that has a Fence/gate.
I don't own any of the Lite cartridges so decided to go with the Songbird Cart.
For my card I used design studio to make the card base using the bird on a fence which I welded to a rectangle, I cut the fence twice more and embossed it vertically using the Woodgrain embossing folder by Craft Concepts. With my last layer I cut off the bird and the slats going across the fence, coloured my little bird with Promarkers and embossed my 'slats' horizontilly with the woodgrain folder to ensure the grain was the right way!These have then been pop dotted for dimension.I cut lots of grass and the little flower border all from Plantin School cart and layered some on the bottom inside and the flower border and some more grasses along the bottom of the fence. The flower border was cut in white and coloured with Promarkers, some gems added and two little resin flowers.Papers used on my card are DCWV for the blue background and the grass is Bo Bunny paper. Finally I made a little ribbon sun using some gorgeous yellow ruffle gingham which I bought from Practising Creativity and the 'sun rays'which say hello are Making Memories Tiny Alphas which I also coloured with my Promarkers.
Don't forget to visit BBTB2 and check out all the fabulous projects created by the DT this week they're absolutely gorgeous! We'd love you to join in our challenge too!
Thanks so much  for popping in today!
Juliexx

Saturday 5 February 2011

BLOG CANDY WINNER!!!


Good evening
I just made the draw for my little Blog Candy using Random Number Generator (see below)


True Random Number Generator 45 Powered by RANDOM.ORG


And the winner is...............................................NO   45


LILLIE!!


Woo hoo Congratulations Lillie!!!

Hope everyone  is having a great weekend!
Juliexx

Wednesday 2 February 2011

THE CUTTLEBUGSPOT TRIFOLD VALENTINE CARD


Good evening
Over at the Cuttlebugspot this week Nilda challenged us to create Trifold Valentine cards and wow you should see the wonderful creations the Design Team have come up with! Mine is quite simple in comparison but it is a trifold!
I designed my card using my Cricut, Plantin School cartridge and Design Studio. I took the square shape and
squashed it up to a 1" rectangle then stretched the length to 9". I duplicated this shape then took a shadow of I and U and a shadow heart and placed them between my 2 rectangles and welded them. I then cut 2 each of the letters and hearts making sure one of each was flipped . After cutting my design I scored at 3" and 6" to make my trifold card, rounded the edges with a corner rounder then pop dotted the letters on each side of the card and did the same with the heart after embossing with the Cuttlebug Love Heart embossing folder. The valentine across the heart is computer genrated and just cut as a thin strip and also duplicated on the back of the card. I used the same papers as the card in my post below as I designed both cards at the same time and am enjoying these colours for Valentines cards.
Please pop over to the Cuttlebugspot and have a look at the wonderful Trifolds my DT sisters have made and be sure to  join in as there is a great prize for a random winner!

Oh and don't forget there's still time to enter to win my little blog candy in the post below!


Have a great week everyone and as always I'm so pleased you took the time to pop and see me!
Juliexx

LinkWithin

Related Posts with Thumbnails